
What is Calendly and why should you include it on your website?
Calendly is a scheduling automation platform which allows people to easily schedule a meeting with you – whether it be in-person, via video call, or over the phone.
You might think, “I already have my phone number and email address on my property website. People can get in touch with me. Why do I need a meeting link, too?” Having a Calendly link on your single-property website means you can drive leads straight to showings when you sync Calendly up with any other calendars you have. That way, clients can only book a time with you when you’re truly free. Calendly also offers several other benefits:
- Potential buyers and sellers can easily book a meeting with you at their convenience – you just choose the duration, meeting type, and times you’re available.
- Calendly is available round the clock, meaning visitors can schedule meetings even outside of your business hours.
- You’re more likely to engage potential clients while their interest in the property is high, increasing the likelihood of conversions.
How to add Calendly to your website:
1. Create a Calendly Account
If you don’t already have an account, go to Calendly’s website and sign up for a free account. You can use your existing email address or sign up via Google or Apple for added convenience.
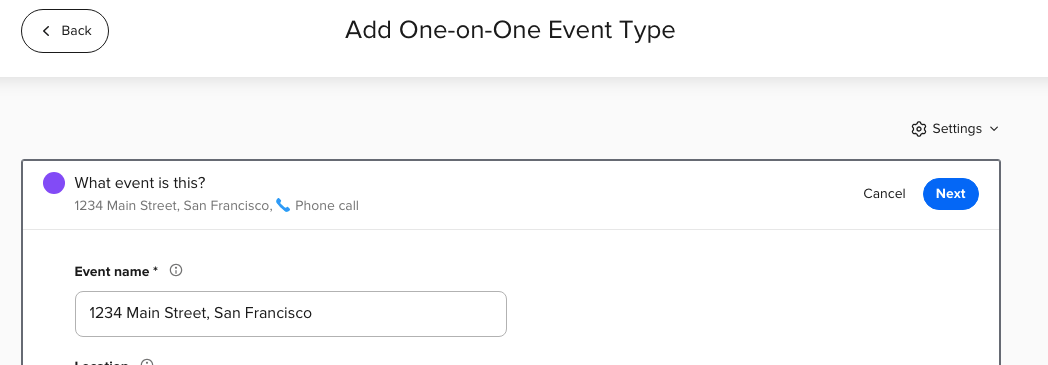
2. Set Meeting Duration
After creating your Calendly account, log in. On the dashboard, specify how long you want the meeting to last, whether it’s 15, 30, or 60 minutes.
Pro tip! You can set up a unique Calendly link for each of your listings so you’ll always know which property a buyer is interested in when they book a time. This will keep you organized and also make you look on top of your game!
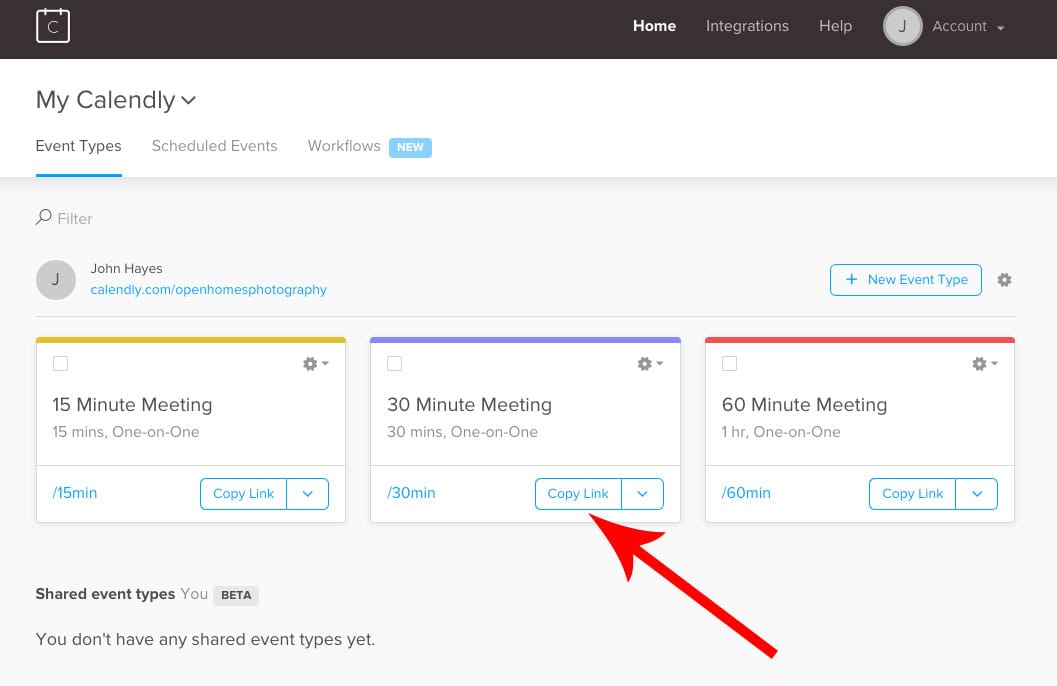
3. Copy Your Meeting Link
Once you’ve configured your meeting settings, Calendly will generate a unique scheduling link. Click the “Copy link” button to save it to your clipboard.
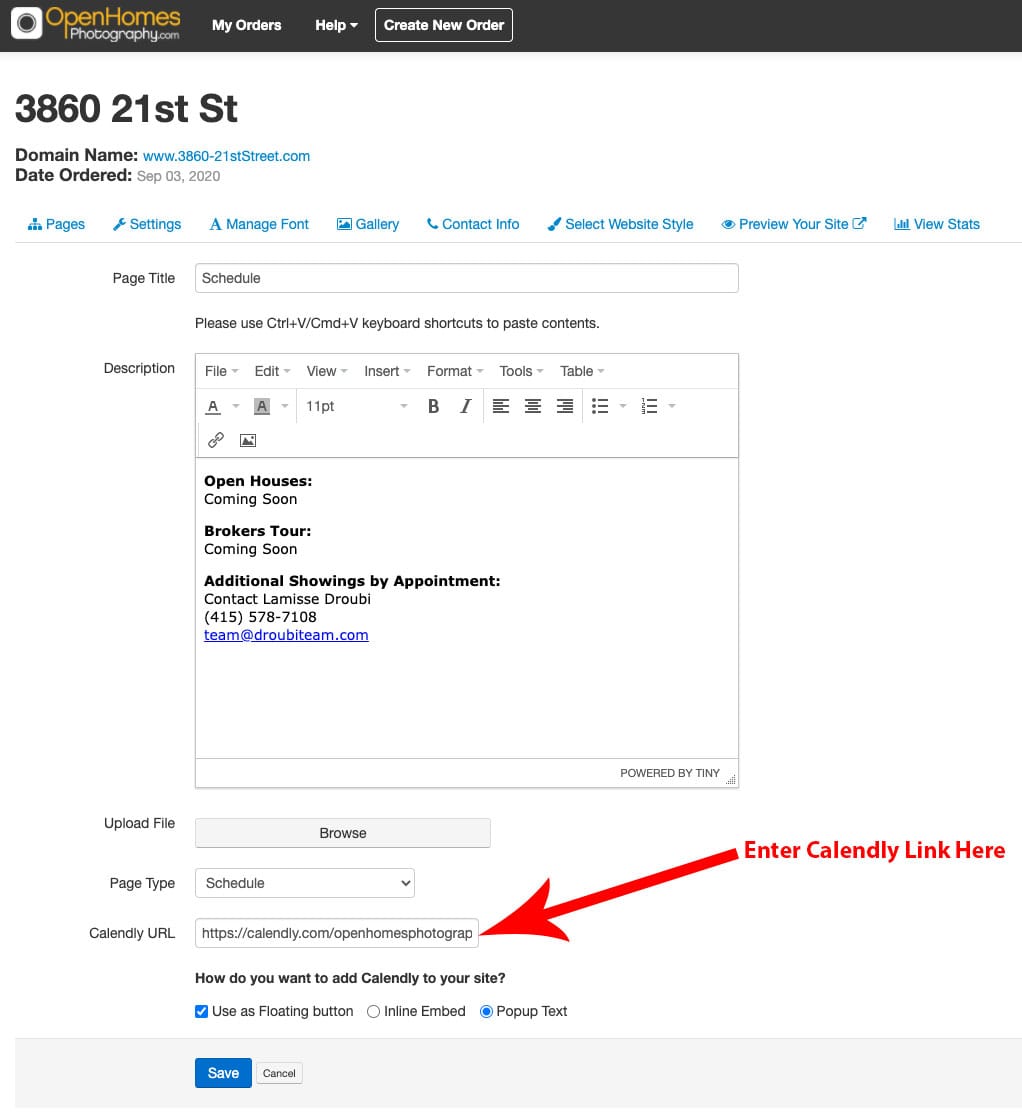
4. Add to Website
Now, access the website editor of your single-property website. Navigate to the Scheduling section and paste the Calendly link you copied in step 3.
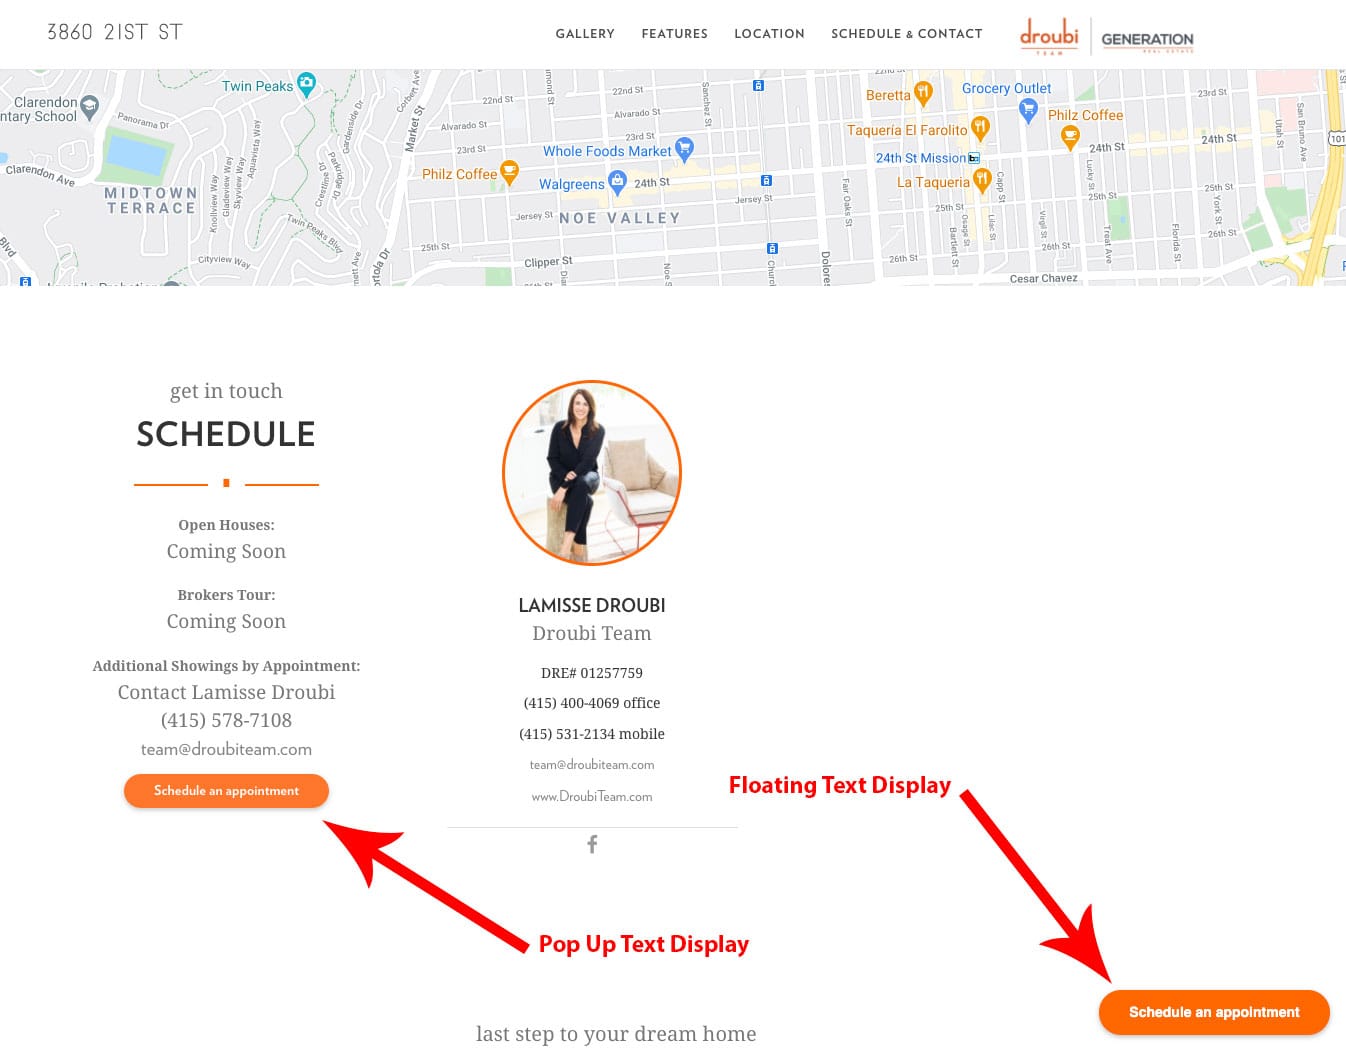
This is how the “Schedule an appointment” text will appear on your website.