


We’ve formulated your timeline for success
Over the past 16 years, Open Homes has helped over 6,000 clients elevate their brands and market over $60 billion in real estate. After working with so many thousands of clients, it’s become apparent that the most successful clients tend to follow a tried-and-true timeline for their listings. Agents may order different packages, market different kinds of homes, and generally have different approaches to selling and buying real estate, but one thing that all the heavy hitters have in common is that they are well-oiled machines when it comes to their marketing schedules. The end result is a smooth, stress-free experience for everyone involved. Check out the ideal timeline below for the smoothest possible launch.
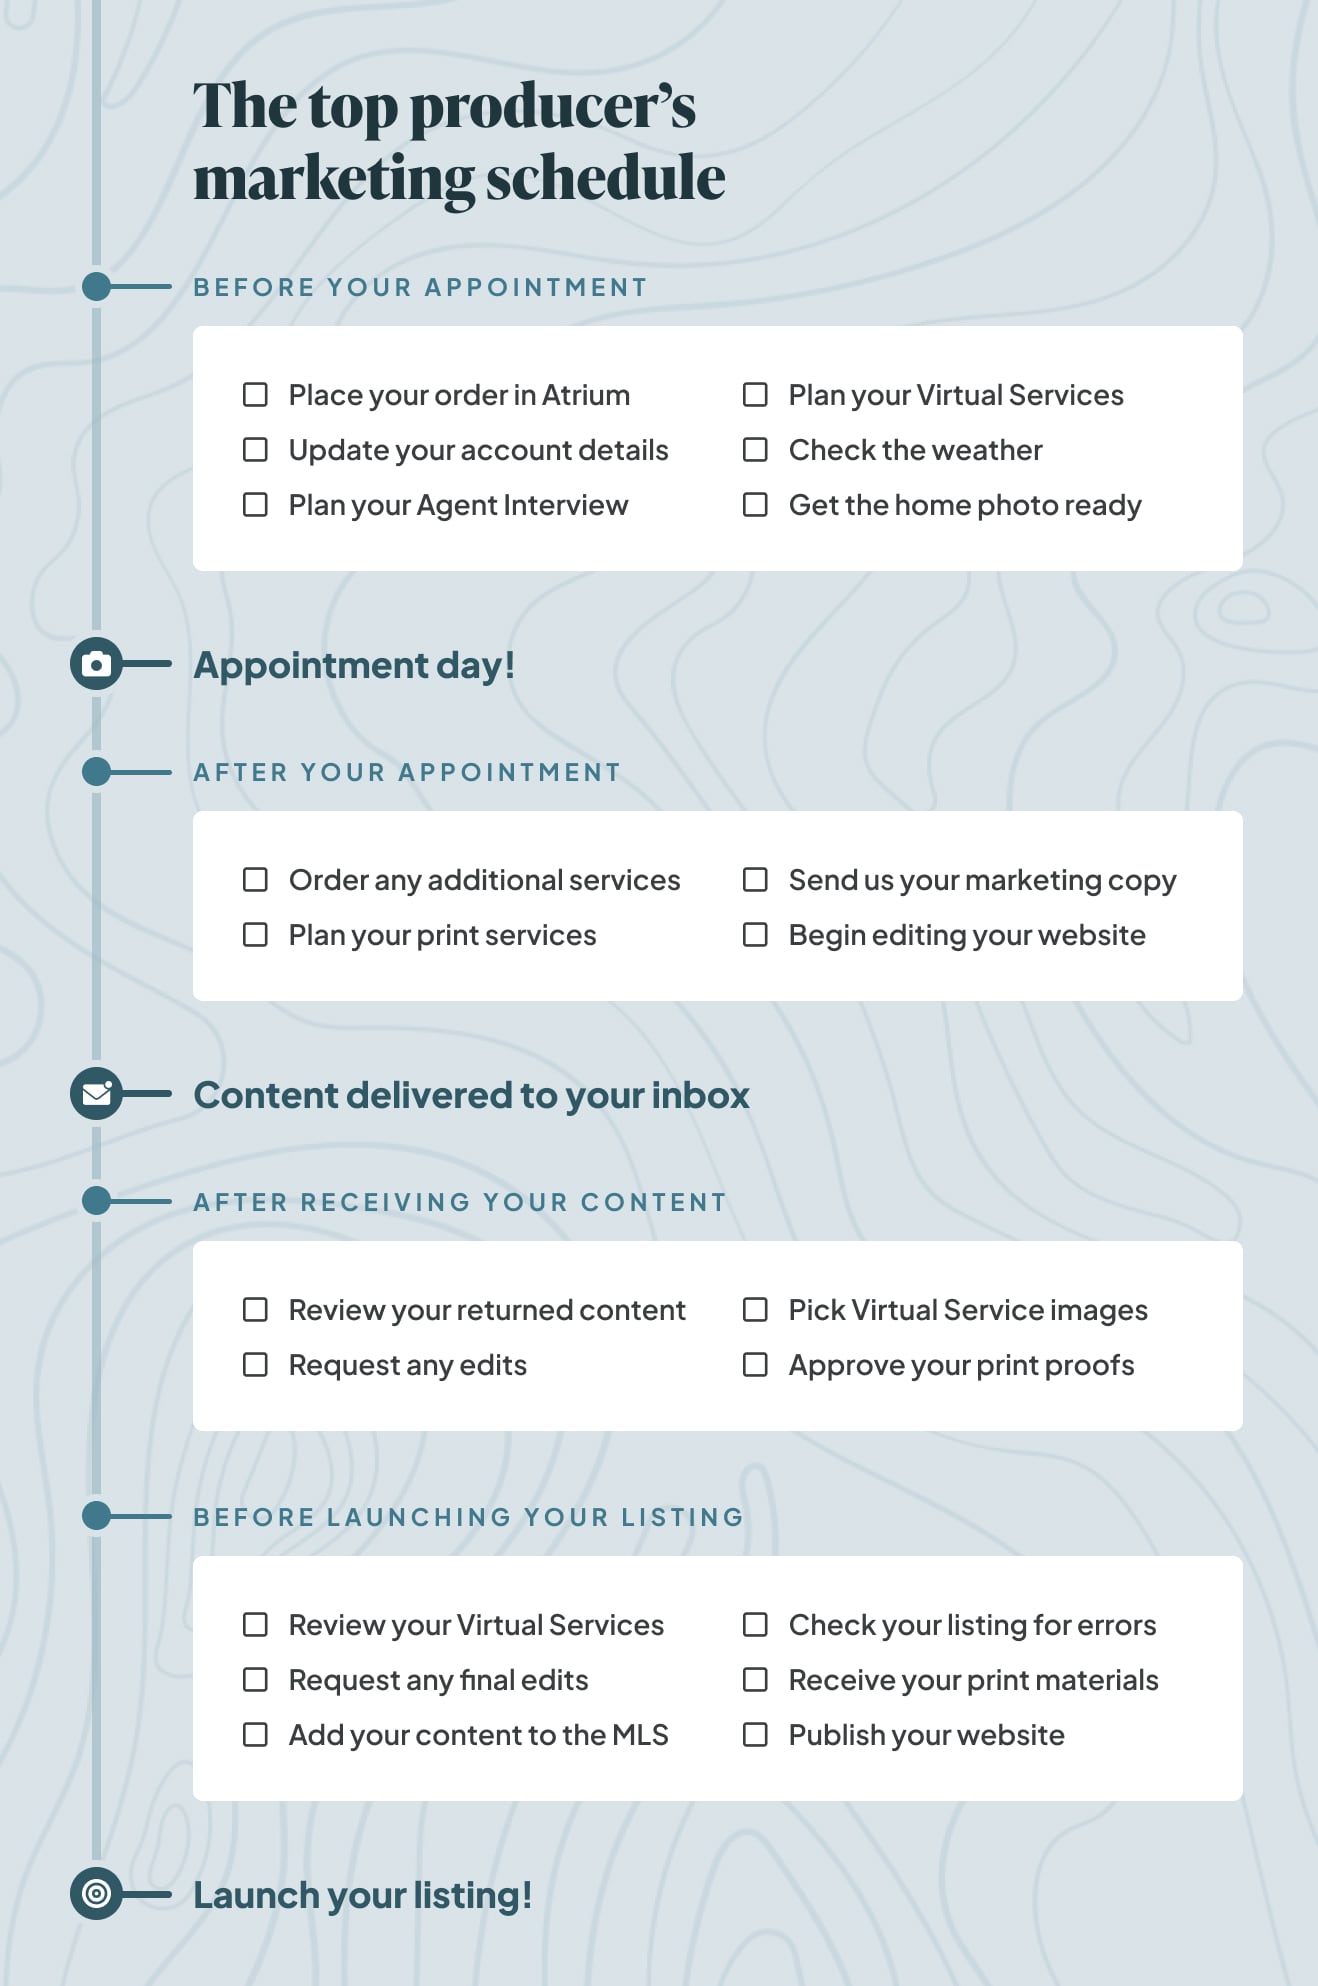
Tip: Print this list and keep it handy for your next listing to keep yourself on track!
Schedule your appointment: Use the Open Homes website to submit an order form. Once our scheduling team has looked over our schedule, we’ll email you confirming the date and time of your appointment.
Make sure the details in your Agent Profile are up-to-date: Log in to Atrium and review your Agent Profile to ensure your details are up-to-date. Check your contact information, brokerage information, and profile photo. This information will be added to your website and print materials, if you ordered these.
Let Open Homes know your go-live date: Be sure to let Open Homes know your desired “Go Live” date, or the date that your property will go live on the MLS – that way, we can ensure your launch is successful and we can help anticipate any issues before they arise!
Consider the weather: If you’ve ordered Aerial Stills, Aerial Video, or Aerial Twilights, add extra time to your timeline to allow for inclement weather. Our drones can’t fly if there is too much moisture in the air, and if your listing has stellar views, you’ll want to make sure they aren’t obscured by clouds or fog.
It’s your appointment day!: Check out our blog post on ways to prepare the house so that our Visual Artists can show up and get right to work.
Discuss additional services you may want to add on: If you’d like to add Video, Virtual Renovation, Virtual Staging, etc., reach out to our Customer Experience team via email, text, or phone call and we’ll do our best to add on any additional services you’d like.
Plan for your video services: If you’ve purchased an Agent Interview, Lifestyle shoot, or Agent Narration, set up a call with your Producer and start planning your script. Be sure to also consider which music and text you’d like to add to your video.
Get ready for Virtual Staging: Select a mood board and specify your intended design direction so that our editors can begin working on these ASAP.
Get ready for print: Pick your print template and begin drafting your marketing copy.
Begin editing your website: Choose your theme, colors, fonts, add co-listing agents, listing price, and marketing text to your site so that it’s ready for your property photos.
Receive your completed photos: If necessary, request up to five complimentary edits. Please allow one additional business day for edits to be returned.
Choose photos for Virtual services: If you ordered Virtual Staging or Virtual Renovation, pick the photos you’d like us to stage or renovate. Note: The time frame for returned images is dependent on the number of rooms selected and the complexity of the , but the edited images traditionally available within one to three business days.
Submit marketing copy for your print materials: Begin working with the Customer Experience team to edit your print materials. We’ll add your marketing copy for you and you can direct us to make changes to photos, text, and more.
Receive your completed videos: If necessary, request video edits. Please allow two additional business days for edits to be returned.
Receive your Virtual Staging images: If necessary, request photo edits. Please allow one to two additional business days for edits to be returned.
Approve your Print materials for printing: Provide your final approval for print proof so materials can be printed and shipped.
Load everything onto the MLS: Add your photos, video link, and Matterport link to the MLS.
Finalize and publish your website: Don’t forget to launch your website from Atrium! This will not happen automatically.
Add the URL to the MLS: Be sure to add your property site’s URL to the MLS.
Receive your printed materials: Or, you can pick up your materials directly from our printer in South San Francisco.
Send your website out to your network: Advertise your property website on social media channels and/or via email blast to ensure it gets as many eyes on it as possible.
Prepare for your Grand Opening: You’re all set! Your property is officially launched and ready for open houses and offers!